Creating art with silhouettes
How to create silhouettes: There are many different ways to create art with silhouettes. The easiest way is to take everyday objects and cut them out of black construction paper, or drawing paper, or something thin and black. Then you can use splashes of color, patterns of light and dark, or just the contrast between the object itself and its shadow. You can also use cut-out shapes from magazines, which can be attached with tape.
The most important thing about creating art with silhouettes is to have fun with it. Once you get a knack for it, you’ll see that it’s a great way to express yourself and your interests in a unique way!
The silhouette is a very simple form of art, but it can be used to create very beautiful things. A silhouette on black paper is a piece of art in its own right. It can be used to create wonderful drawings and paintings.
The classic example of a silhouette picture is of course the outline of a person:
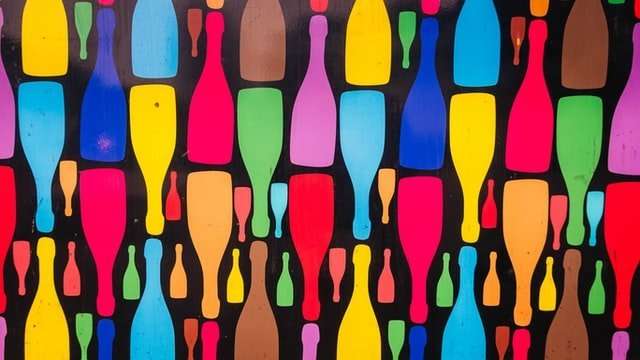
But you can also use this technique on other objects and materials. Here are some examples:
You can use black boarder paper to create silhouettes from everyday objects. This is called “black-lining.” The basic idea is that the black border becomes the frame for your picture. The most common material for this is cardboard or thin wood, but it can be done on other materials as well:
You can also use white boarder paper or thin wood (or any other white material) to create silhouettes from colored objects. This is called “white-lining.”
You can cover part of an object with white boarder paper and then draw or paint whatever you want on the uncovered part. This allows you to get different effects than when you do the whole object in one color:
The main thing is to experiment with different objects, colors and materials. You will find that there are many interesting combinations possible.”
Silhouette art is a simple technique that can be used to create fascinating 3D images by manipulating black paper. This article explains how it works and how you can use this technique to create your own unique designs. It also provides some tips on using the technique to create interesting effects, and describes some of the equipment that you can use to help you create your own silhouette artwork.
Description:How to make silhouette art
Silhouette art is a simple and versatile technique for creating punches of color and shape. The artwork is created from objects that are usually discarded as trash, or taken for granted.
Silhouette art can be used to create works of art, to create an interesting visual effect, or to make a statement.
The process is simple: Use whatever object you want, place it against a black background, and photograph it without using a flash.
Silhouettes are a lot of fun to make. By using them you can create some great works of art. The basic idea is simple enough, but there are some tricks that will make your silhouettes more interesting.
One way to create a silhouette is to pull an object into a shadow. The shadow will have the same outline as the object. For example, you can make a cat’s silhouette by placing it in front of a light source and then blocking out the light with some opaque object like paper or cardboard.
The easiest way to create a silhouette is to use an object which has an outline that contrasts with its background. A black object on white paper makes a good silhouette.
A silhouette is also called an “outline” picture because it is just what happens when you look at something from far enough away that you can’t see the details. In fact, we are surrounded by silhouettes all the time. Whenever we see something from far away and against a contrasting background, we are seeing its silhouette.”
Now that you’ve created your silhouette art, it’s time to display it on the wall. To hang a silhouette picture properly, the back of the picture must be perfectly straight. If there is any warp at all, then you will have to put a frame around your picture or cover the back with a flat piece of cardboard. The easiest way to keep the back straight is to use 2-part mounting tape.